Over 3 million pictures framed
Creating a stunning gallery wall
Creating a gallery wall certainly makes a statement. It commands attention and makes a wonderful focal point for your room, so we teamed up with influencer @HomeAtHeathfield to guide you through her stunning gallery wall.
We recently teamed up with Yasmin @HomeAtHeathfield on Instagram to work on some truly fantastic gallery wall content to help guide you in the right direction when creating your dream home!
Utilising Instagram stories, along with careful planning, Yasmin details how she went about creating her stunning gallery wall and let’s just say the results speak for themselves! If you need some inspiration for your home, you’ve come to the right place…
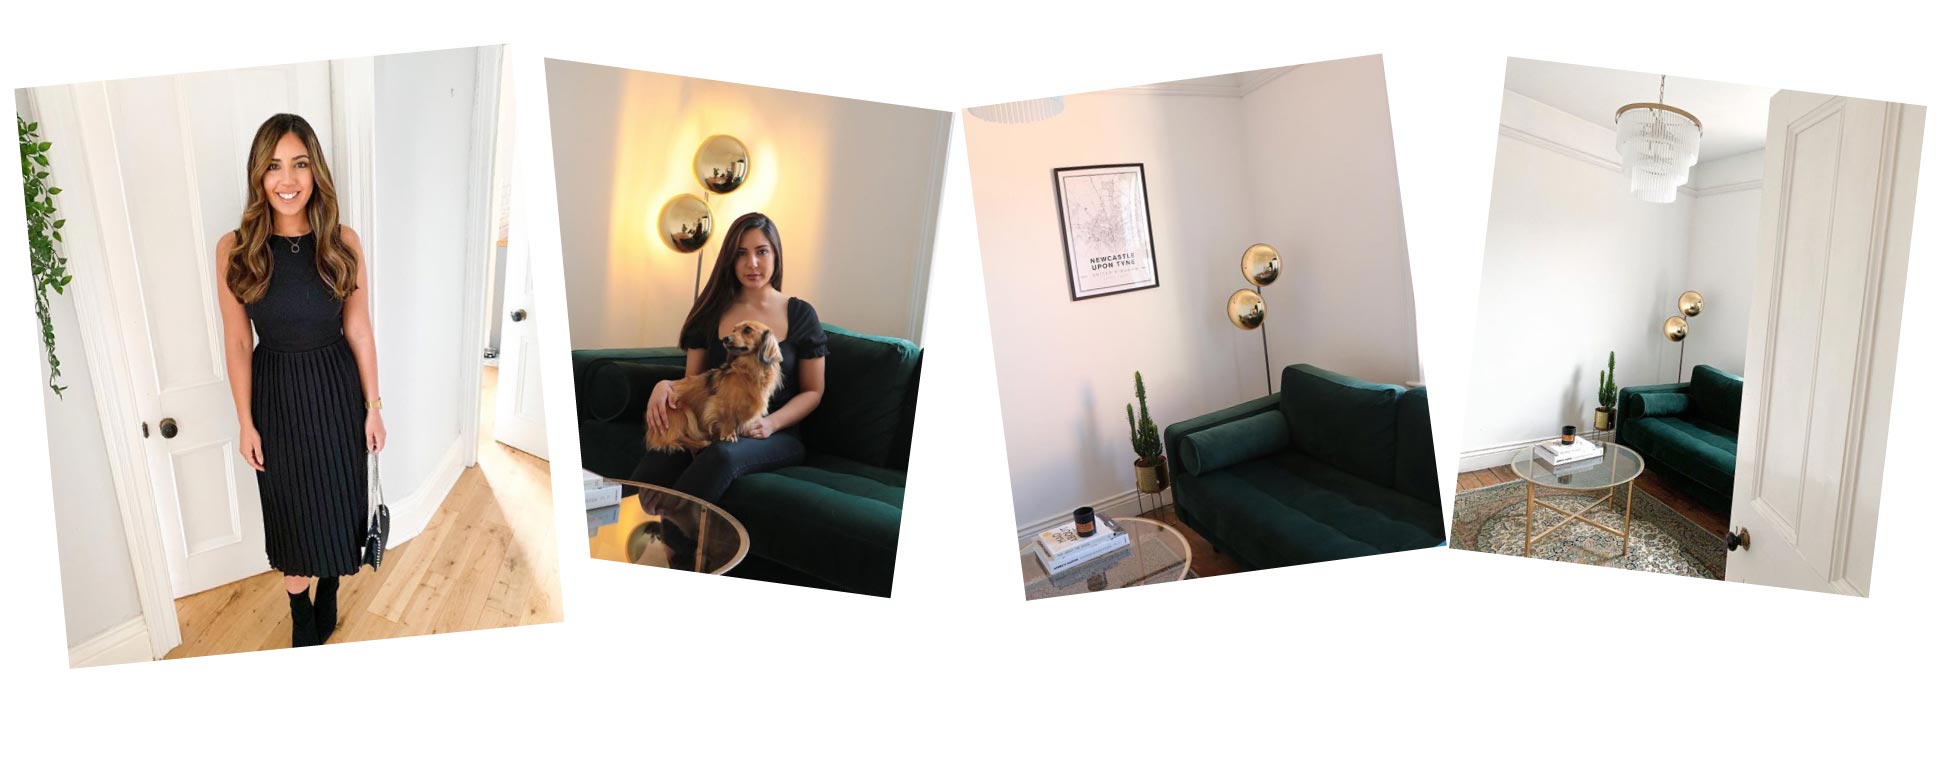
The Concept:
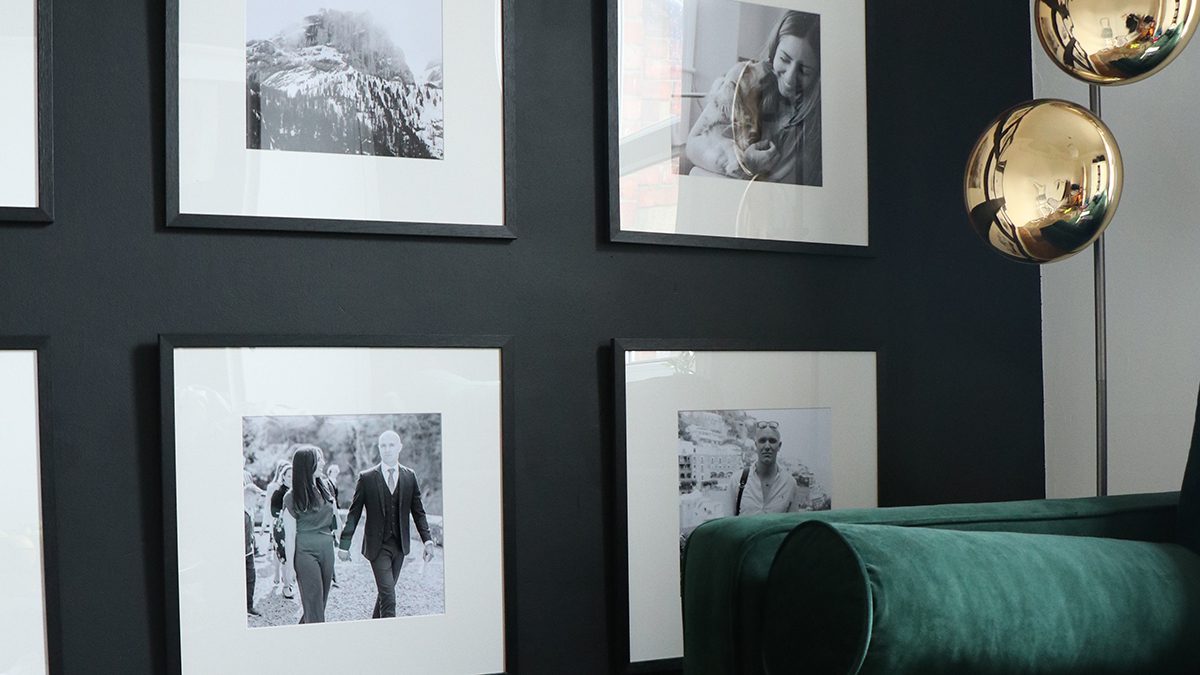
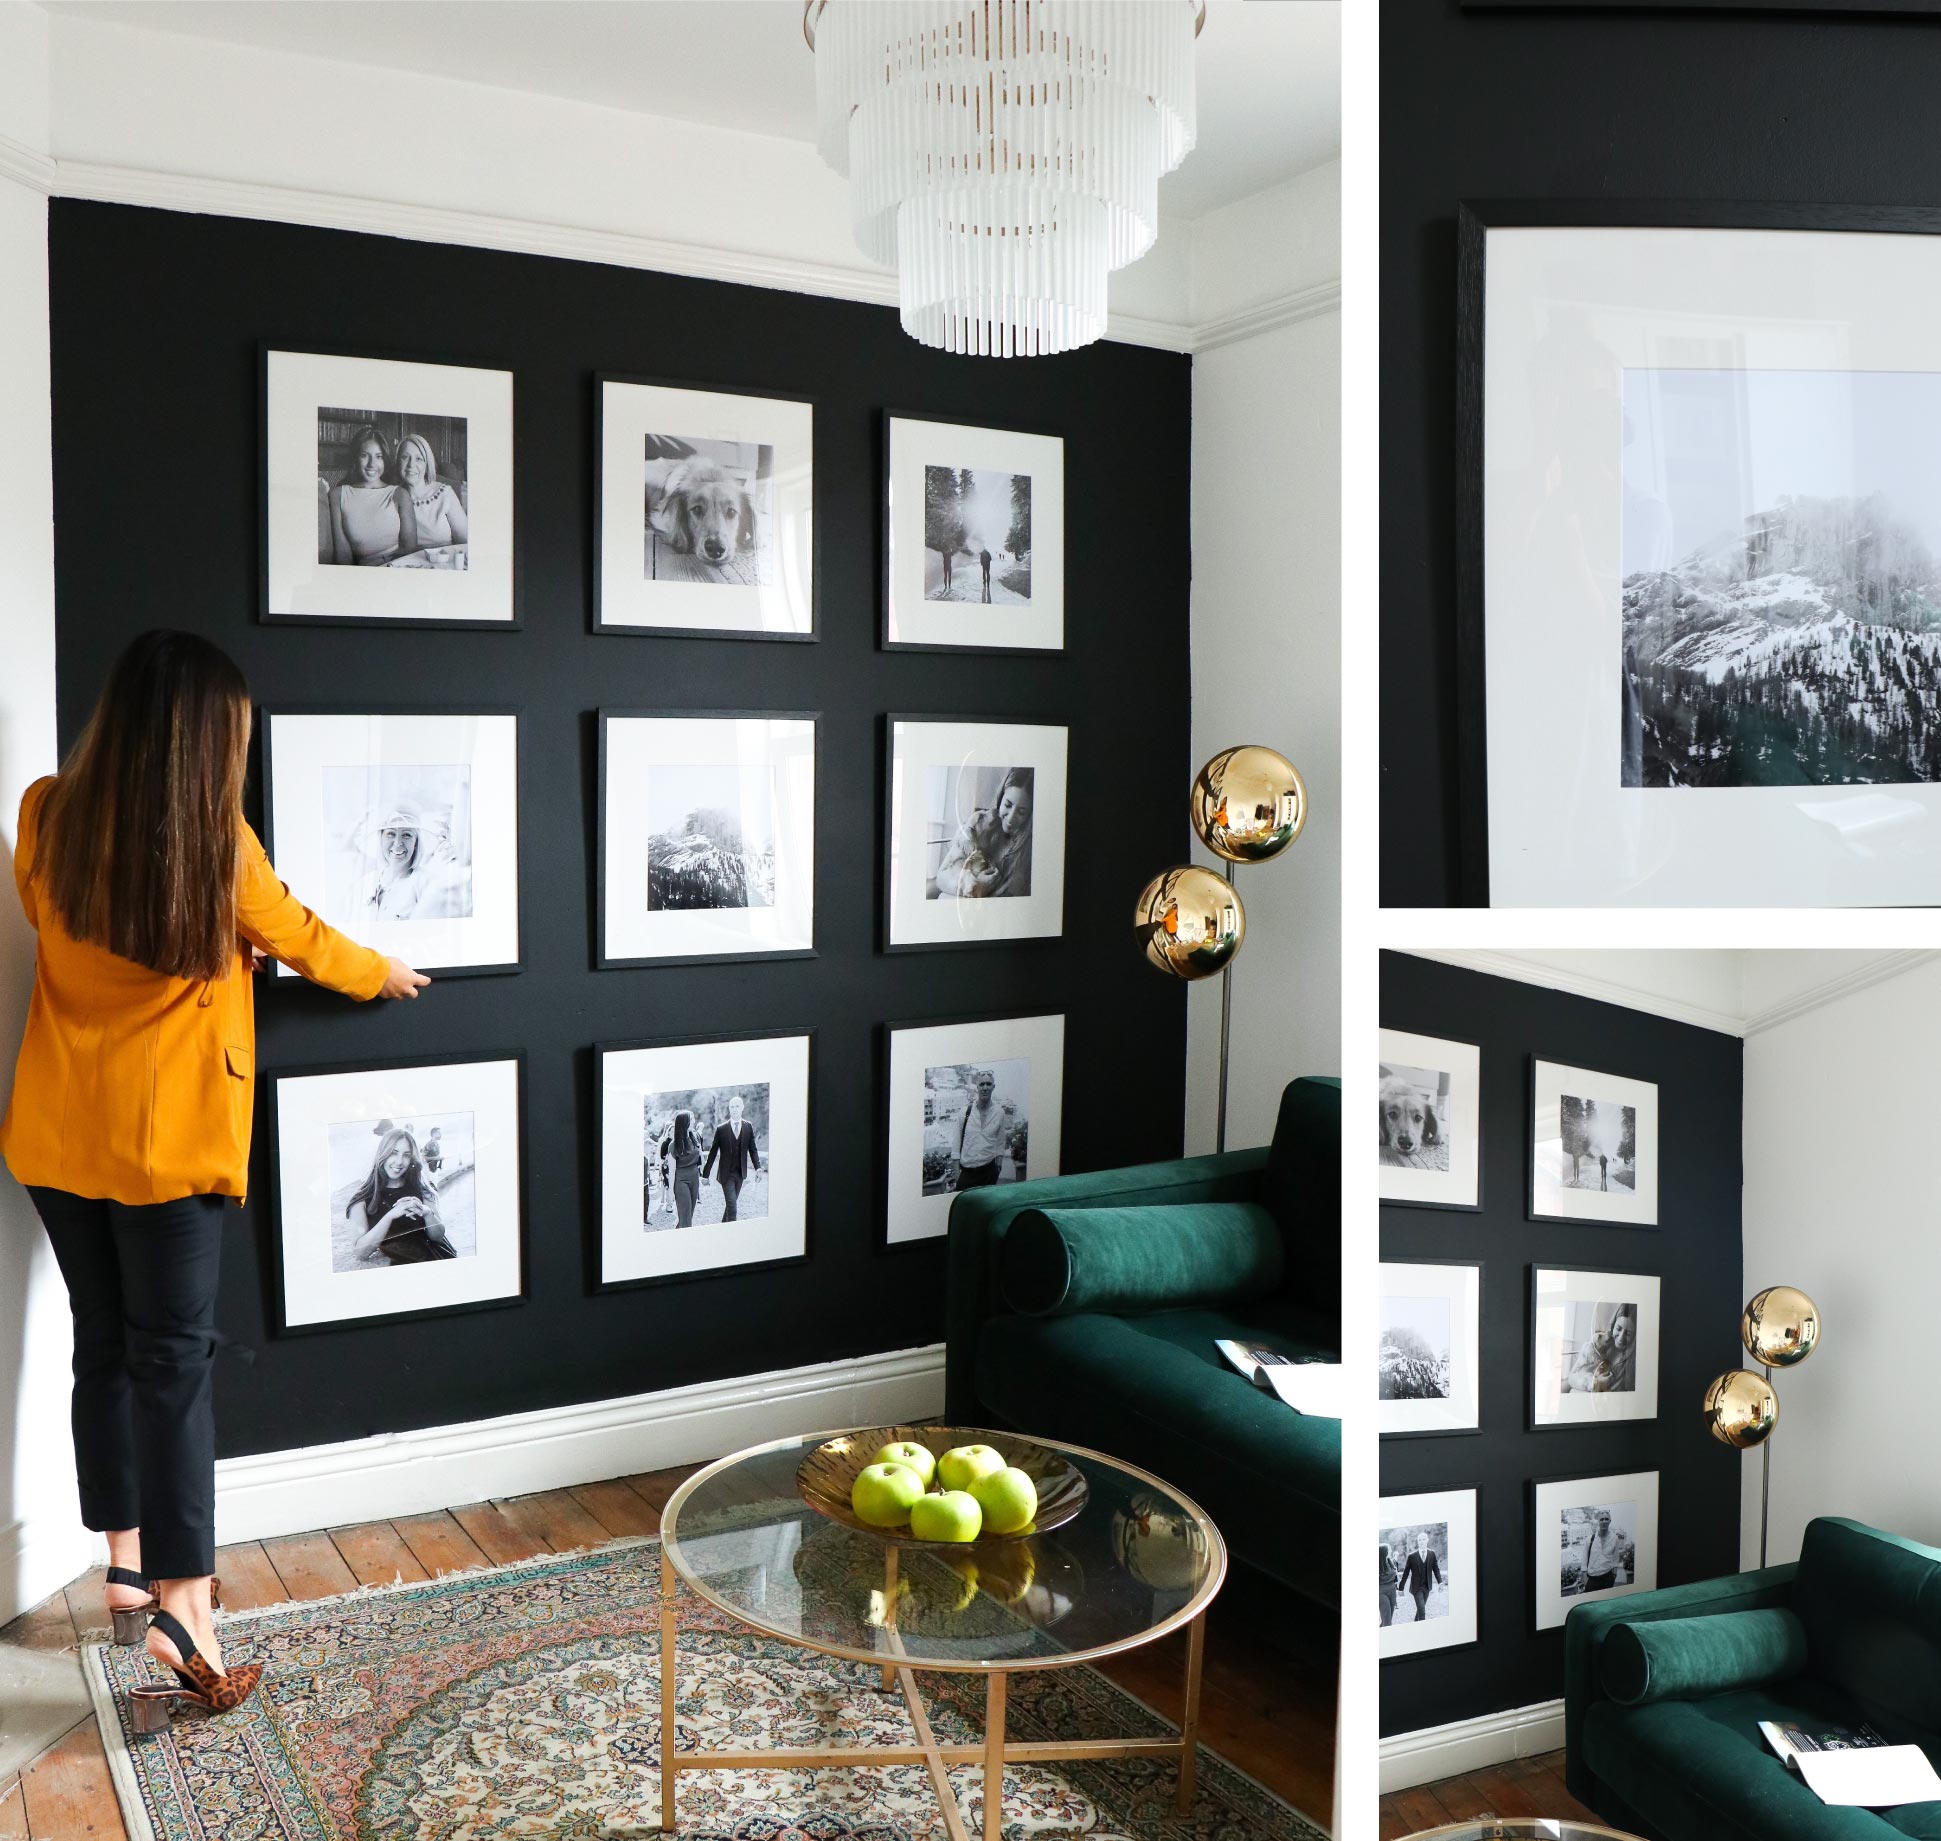
Firstly, Yasmin had to decide where she wanted to place the gallery wall, remember this is one of the key feature pieces of your home, it must take pride of place and be somewhere you can enjoy it regularly. Yasmin decided she wanted the gallery wall within her home office, a place where she could admire it daily and create a comfortable working environment. With regards to the design, Yasmin has gone for a traditional 3 wide by 3 deep grid pattern. Though the placement appears simple, you will need to measure the distance between each frame, or you could opt for a less strict placement structure should you prefer. However, the simplicity of this design does not take away from the fact that its guaranteed to ensure it’s a standout feature of your home.
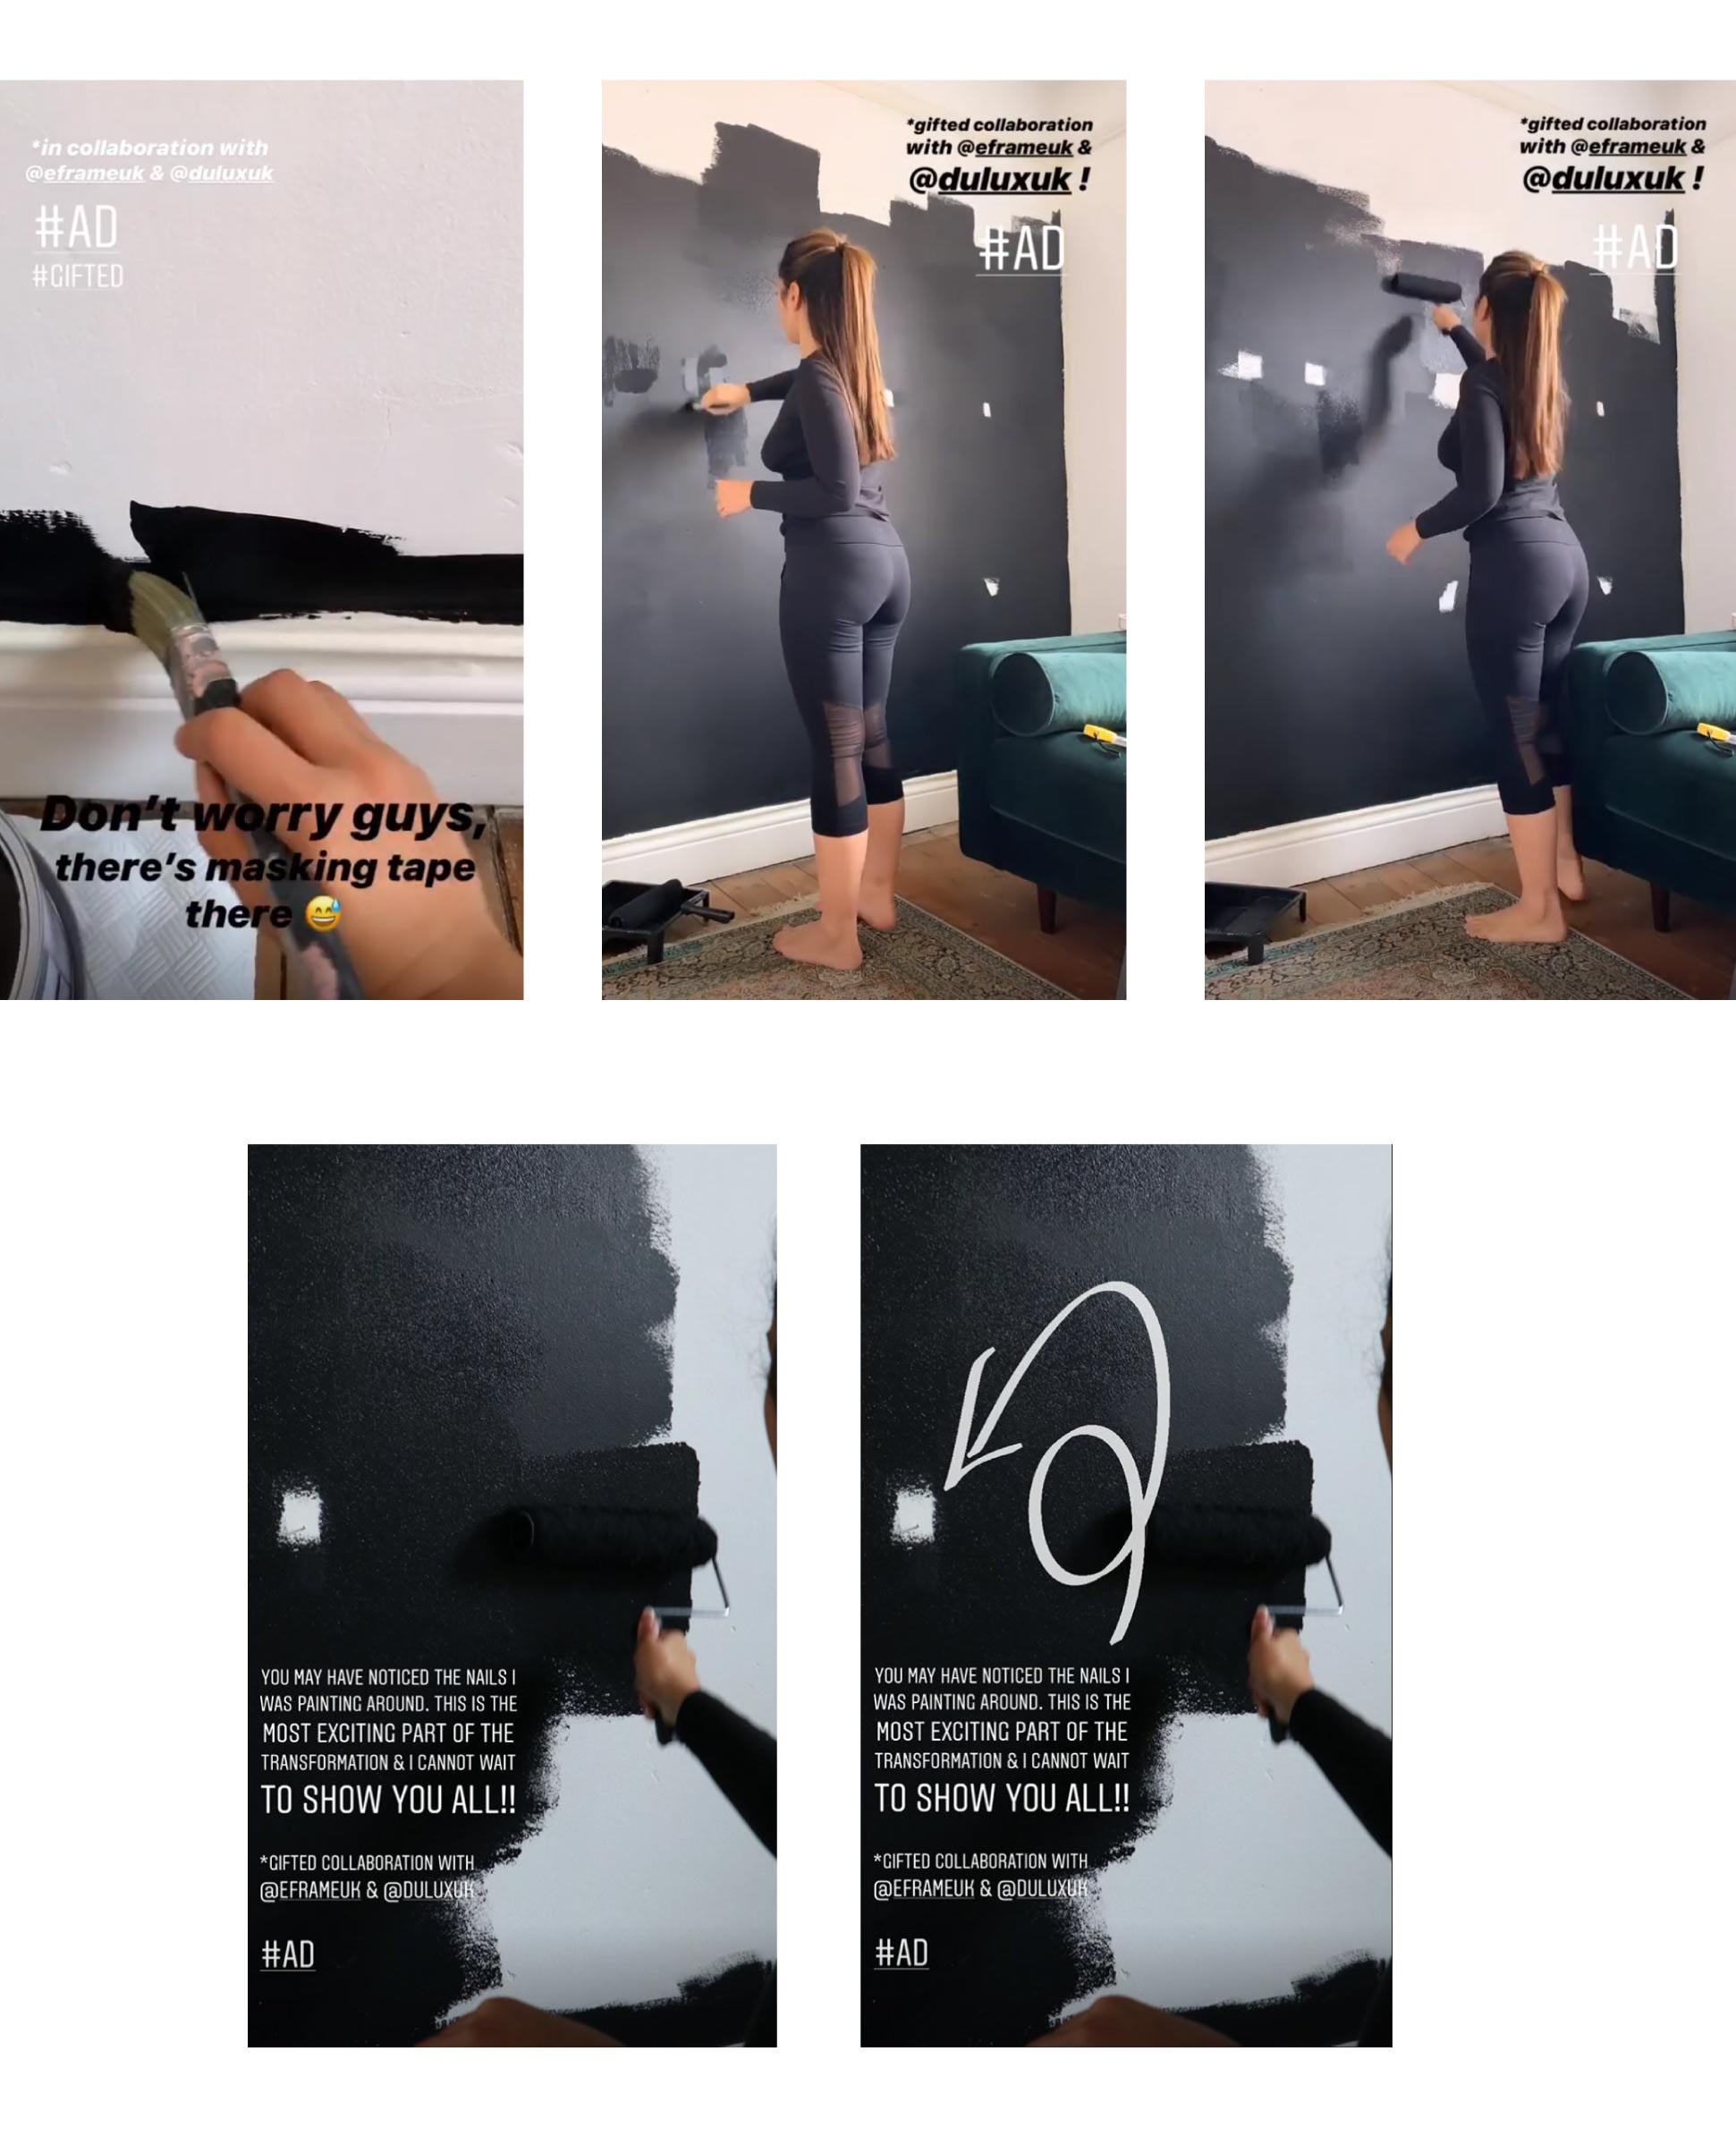
The next stage was deciding upon a colour scheme, this is where Yasmin opted for Dulux as her paint of choice, the colour being Dulux Rich Black . The idea was to transform the entire wall space into a feature wall. The colours complement one another and work in perfect harmony. With placement and a colour scheme now defined, it was time to decide upon the picture frames, Yasmin has gone for stained wood frames in black. These frames are contemporary in nature and will enhance any interior.
They are handcrafted and are a popular choice due to their versatility and timeless style, the look has been completed with the addition of a single mount. These frame deigns work particularly well with monochrome images, therefore you could utilise our service to print and frame some of your favourite shots in black and white. If you want to read a little more about how to make black frames work within your home we have a dedicated style guide to help inspire the styles of your picture frame selection.
With regards to the all-important imagery within the frame, Yasmin has picked sentimental memories which are special to her family and make the gallery wall extremely personal.
All the photographs used in the frames are personal to me… I did not want to use random images of pieces of art that I thought were good, the use of photographs makes it more personal to me and my partner James…
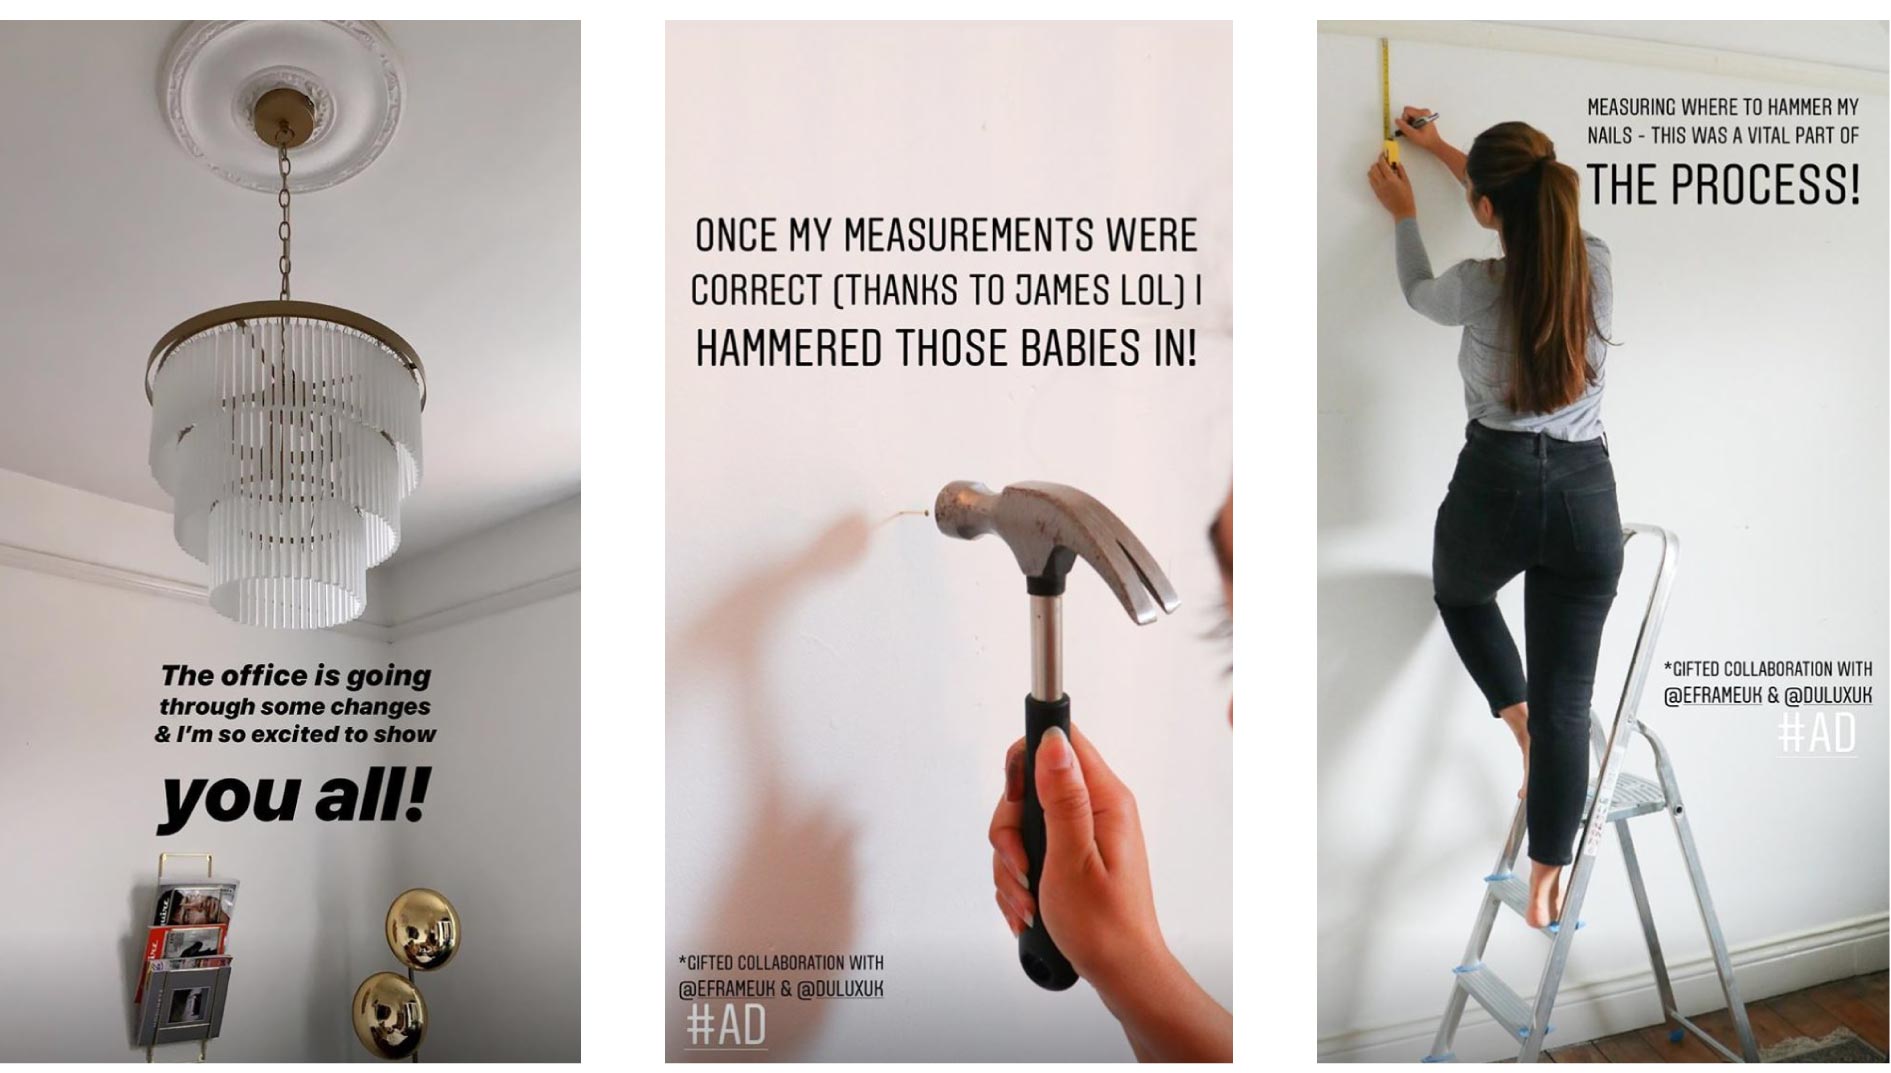
The Process…
After meausring out where to hang her frames Yasmin then set about painting the painted the walls of her office.
Please note that Yasmin has covered the entire wall expect for the sections where the hanging fixings will be placed, this helps later on with being able to clearly identify where you placed your pencil mark.
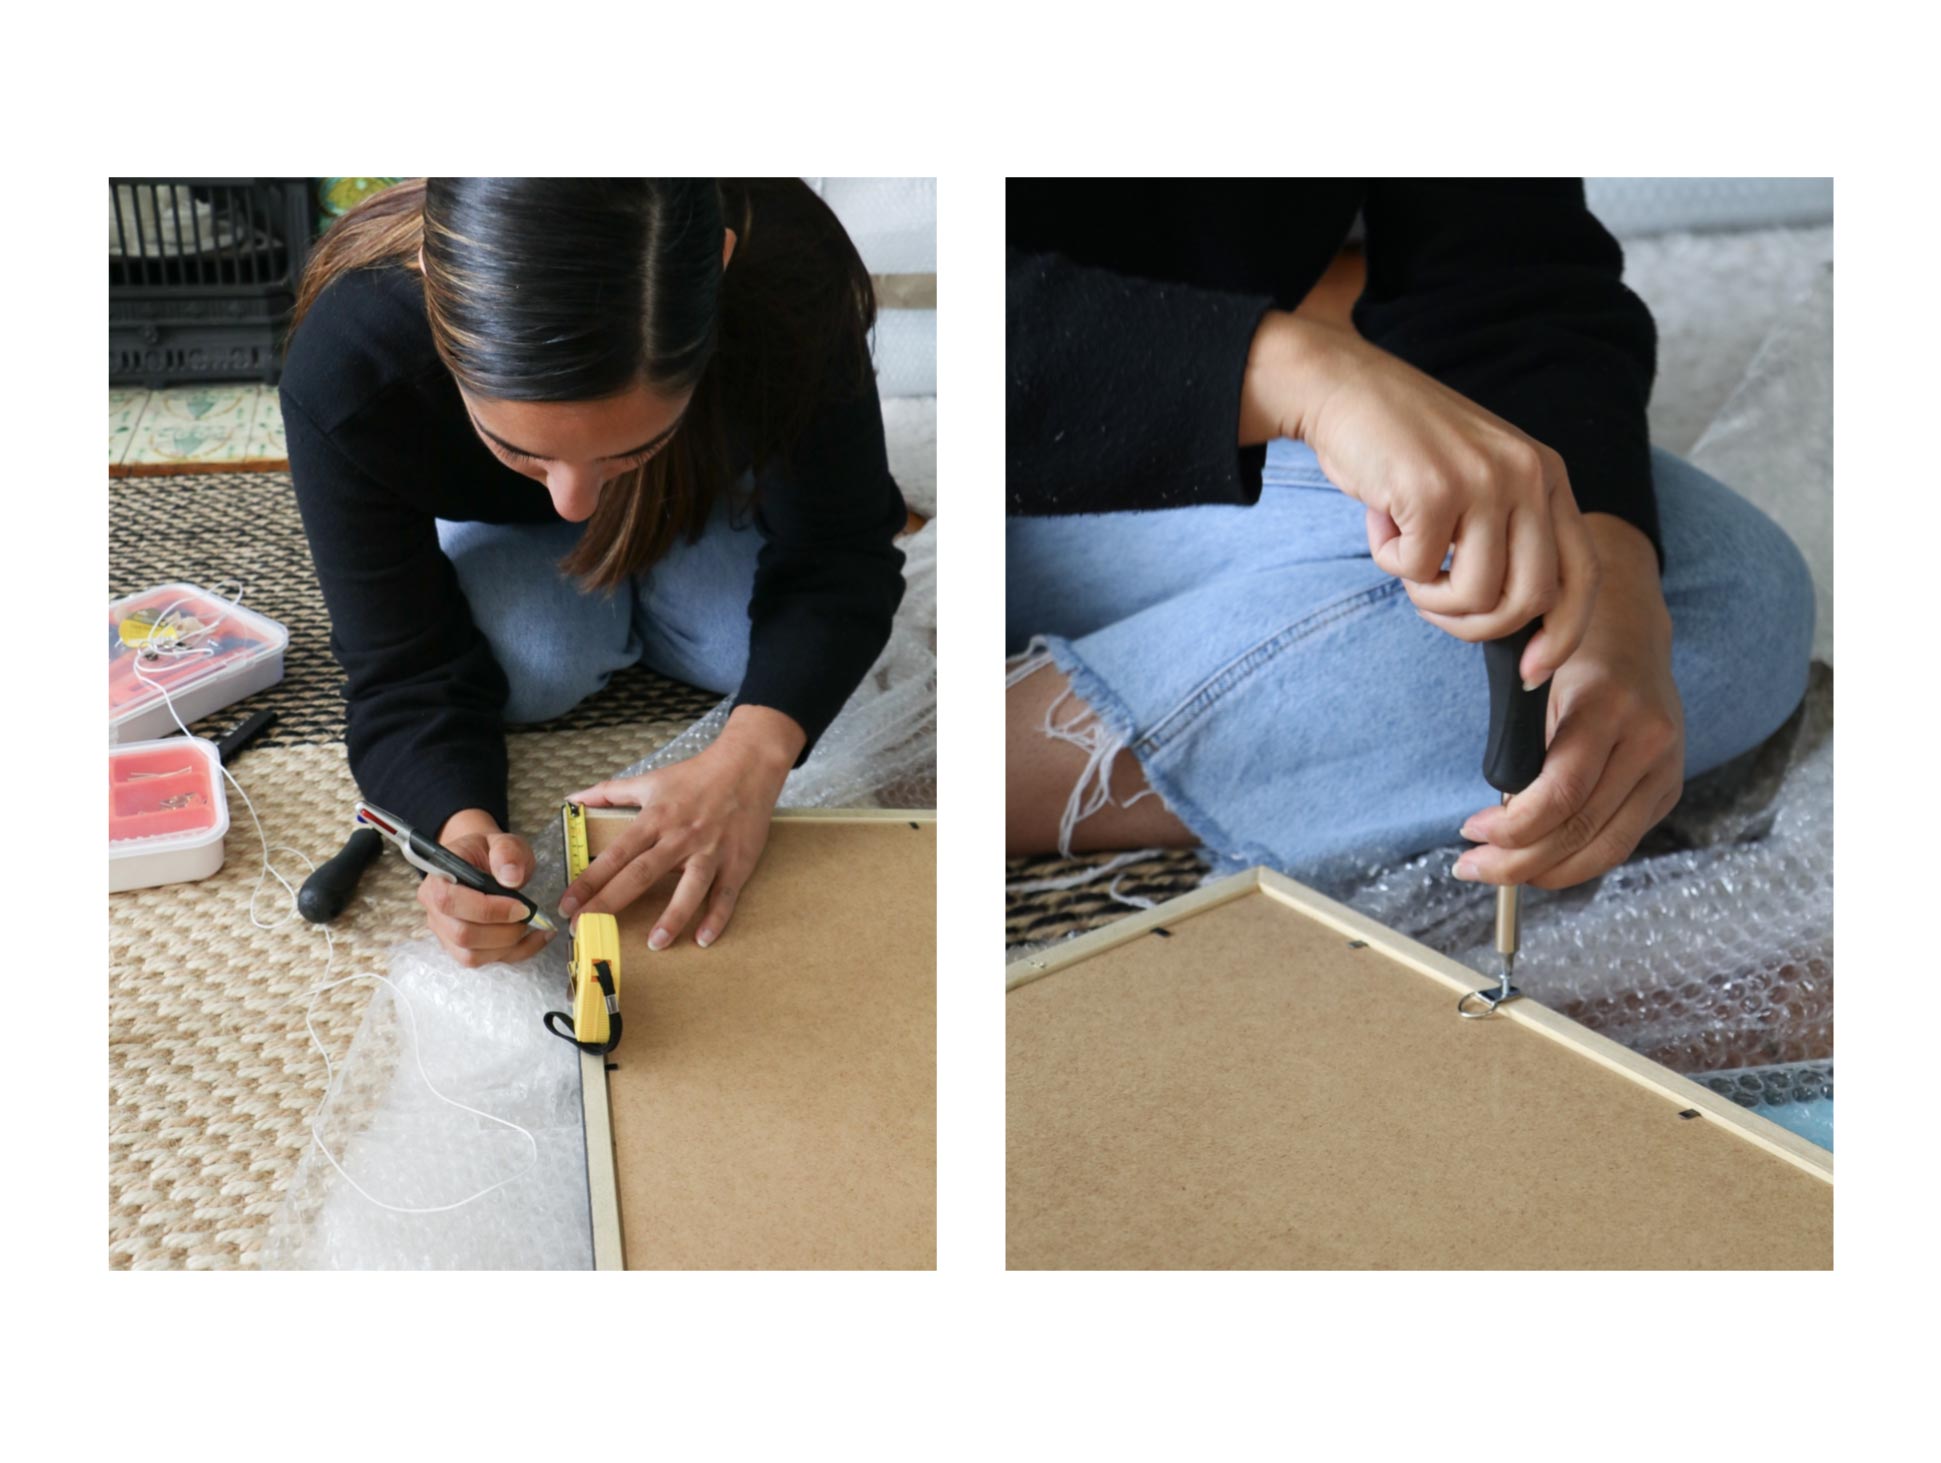
Once the wall complete and Yasmin was happy with the finish, it was time to put together the frames. All of our frames arrive with hanging cord and D rings, making them very simple to hang. All you need to do next is fit your prints into the picture frames (If you didn’t take advantage of our print and fitting service.) With wooden frames you simply need to remove the backing board, if you need help with this step please follow our “fitting a picture to frame – How-To Guide” here. Once you have placed your pictures into the frame, its time get hanging. Having already worked out where each frame would go, once more underlining the importance of preparation, Yasmin was ready to apply the finishing touches to her dream office space, with the results speaking for themselves…
It really isn’t difficult to recreate a gallery wall like this within your own home. Simply follow the same steps as Yasmin and you will soon have your dream feature wall. If you need any further advice, please do not hesitate to contact our social media team or customer services…
The Finished Project…
Planning your gallery wall
- Measure the total space you want to allocate for your gallery wall: Like Yasmin you will need to measure the space of the wall you wish to fill. Only measure the area of the wall you want to use and tape of the section you have allocated for the gallery wall.
- Decide upon an arrangement for your picture frames: There are plenty of options out there for you to create the perfect gallery wall, we advise you search online and find inspiration from your favourite websites. As stated, Yasmin went for a 3×3 grid but there are plenty of different variations for you to choose from. Just pick your orientation and choose the amount of wall space you wish to fill. You then need to decide how many pieces (frames) you want to include in your gallery wall.
- Pick your frames: Yasmin went for personal photos within her Gallery wall picture frames, this doesn’t mean you have to do the same though! You could opt for a theme, or mix it up with a variety of different pieces of artwork. Ink and Drop do some fantastic artwork which looks great in any gallery wall.
- Time to measure: This is where we mentioned the need to measure the distance between each frame, but don’t worry, it’s not as intimidating as it seems! You already know how many frames you will be hanging, along with the space you previously allocated. Simply take the total width of the space and divide by the number of pictures frames you have, accounting for roughly 2 inches (5.8cms). For example… Therefore, if the space you have is 70 inches (177.8cm) wide, and you know you want your grid to be three frames wide the maths would be as follows… 70 inches minus 4 inches (two 2-inch gaps between three frames) is 66 inches; 66 divided by 3 frames is 22. Each frame should be 22 inches ( 55.88 ) long. In order to calculate the height of each frame, please do the same calculation but for height instead.
For more information visit Yasmin’s Instagram Account @HomeAtHeathFields